The Ship and the Math
In this chapter, we are going to create our ship and make it move. But we are not going to copy a script. We are going to understand why it moves. and for that, we have to talk about our friend (or enemy): The Arrow (The Vector).
Need graphics?
To follow this course, you will need a ship. If you don’t have one handy, we strongly recommend the free pack Kenney Space Shooter Extension. It’s clean, beautiful, and perfect for learning.
Need to edit the images? No need to pirate anything. You have the Affinity Studio suite available for free on the web.
1. The Stage (Cartesian Plane)
Your monitor is a grid of pixels.
- X (Horizontal): Grows to the right.
- Y (Vertical): Grows DOWNWARDS.
Watch out for the Y!
In school math, Y grows upwards. In Game Dev, Y grows downwards (because we start drawing from the top-left corner). Don’t forget this or your ship will fly upside down.
2. Choosing the Node (Your Ship)
In the intro, we said that “Everything is a Scene”. True, but… what is a scene made of? Of Nodes. If the Scene is the house, the Nodes are the bricks. And there are many types of bricks:
- Node2D: It is the base for the 2D world. It has position
(x, y), rotation, and scale. (If we were in 3D, it would beNode3D, and for interfacesControl, but here we live in the plane). - RigidBody2D: It has real physics (gravity, bounces). If you kick it, it flies away. Difficult to control for a main character.
- CharacterBody2D: The perfect middle ground. It has position (like Node2D) and knows how to collide (like RigidBody), but it doesn’t move by itself. YOU are the engine. It is the standard for characters in 2D games.
Prepare your Assets
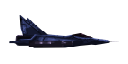
Before starting, you need a ship. You can draw one or use this test one:
Right click -> Save image.
Credits: PSX Plane by Puck.
- Create a folder called
spritesin your FileSystem. - Drag this image into it.
Steps:
- In the empty scene that appears by default:
- In the “Create Root Node” panel, select Other Node.
- Type
CharacterBody2Din the search bar and double-click it. This will create a new scene with this node as the root. Call itPlayer. - The node will complain with a warning ⚠️. It’s telling you: “Hey, I have a physical body but I have no shape! Am I a circle? A square?”.
- Add a child node to
CharacterBody2DcalledCollisionShape2D.- In the Inspector, where it says Shape, select
New CircleShape2D. - Important: Click on the box that says “CircleShape2D” (it will expand).
- In Radius, write
40 px. This will adjust the exact size without scaling the node.
- In the Inspector, where it says Shape, select
- Add another child node
Sprite2Dto make it look nice (drag your ship image to the Texture property). - Create a folder called
scenesin the project root and save the scene inside asplayer.tscn.
Golden Rule: Hitbox vs Sprite
In Game Design, there is an unwritten rule: “Better too much than too little”.
- If your collision is larger than the ship, the player will scream “But it didn’t touch me!” when they die in thin air. That feels unfair.
- If your collision is a bit smaller, you allow bullets to “graze” the ship without killing it. That generates moments of “Phew, almost!” that feel epic.
Always give the player a little advantage. Make the CollisionShape 10-20% smaller than the visible drawing.
3. GDScript Basics
Before writing code, you need to know how to read the map. If you have never programmed, this is all you need to know for now:
-
extends(Inheritance): It is the first line. It tells Godot: “I am an extension of…”.extends CharacterBody2D: If you extend from, as in this case,CharacterBody2D, it means that the script now has all the methods and properties of a CharacterBody2D, plus whatever you add.
This is called Class Inheritance. It is a fundamental concept of object-oriented programming. Your script doesn’t start from scratch: it inherits an already functional “vehicle” with wheels, engine, and steering wheel (
CharacterBody2D), and you only add the customization (your movement logic). -
func(Action/Verb): It is an order or task. It groups a list of steps.func _physics_process(delta): It is a special function that Godot calls at a fixed rate (by default 60 times per second). Everything you write inside will be repeated in a loop to move things.
-
var(Variable): It is a place where we store information in the computer’s RAM.var speed = 300: We have reserved a slot in memory, labeled it “speed”, and stored the number 300 inside.
Danger: Tabs vs Spaces
GODOT DOES NOT FORGIVE. Indentation (those spaces to the left) defines which code is inside which function.
- Always use Tabs (Tab Key ↹), not spaces.
- Never mix tabs and spaces in the same file or you will have invisible errors.
- Note: The copy button on this website tries to convert spaces to Tabs automatically, but if you see red errors, check this first.
4. Creating the Script
Our ship is pretty, but it does nothing. We need a Script.
- Create a folder in the root called
scripts. - Select the root node
Player. - Click on the Scroll with a green
+icon (above the scene panel). Or right-click -> Attach Script. - A window will appear.
- Template: Leave it at
CharacterBody2D: Basic Movementif you want to see a lot of complex code, or set it toEmptyto start clean. We will delete everything, so it doesn’t matter. - Path: Here is the key. Don’t throw it in the root. Type
res://scripts/player.gd. - Click Create.
Now you will see a text editor. Welcome to your first program!
5. The Problem of “Moving”
To move the ship, we need to tell it where to go. Here is where Vectors come in.
A vector is nothing more than an arrow. In video games, when that arrow tells us “where to”, we call it a Direction Vector.
- If you touch Right, the vector points to
(1, 0). - If you touch Down, the vector points to
(0, 1).
In Godot, this is called Input.get_vector().
But getting the vector doesn’t move the ship. It only tells us “where the player wants to go”.
To move it, we need two magical things that live inside CharacterBody2D:
velocity: It is an internal variable. Imagine it as the ship’s speedometer. You tell it “Go at 300 km/h following this vector”.move_and_slide(): This function is the engine. You tell it “Start!”. And it alone looks for thevelocityvariable and moves the ship that amount, colliding if necessary.
You don’t have to pass velocity to move_and_slide(). It does it automatically.
Here is the complete code. I recommend writing it by hand to memorize the commands, but if you are in a hurry, you can copy it.
extends CharacterBody2D

func _physics_process(delta):
  var direction = Input.get_vector("move_left", "move_right", "move_up", "move_down")

  velocity = direction * 400
  move_and_slide()
extends CharacterBody2D
func _physics_process(delta):
var direction = Input.get_vector("move_left", "move_right", "move_up", "move_down")
velocity = direction * 400
move_and_slide()Line-by-line Breakdown:
1. extends CharacterBody2D
We already know this is inheritance. Here we use it specifically to unlock the velocity variable. If we extended from a simple Node2D, this variable wouldn’t exist and we would have to calculate physics manually. By inheriting from CharacterBody2D, we gain the entire collision system without having to rewrite logic that CharacterBody2D already gives us.
2. func _physics_process(delta):
We use the physics loop (and not the normal _process) because move_and_slide() needs perfect stability to calculate collisions. If we used the visual loop, the ship might go through walls if the game lags. Here we ensure the movement is solid as a rock.
3. var direction = Input.get_vector(...)
| Key(s) pressed | Value of direction |
|---|---|
| None | (0, 0) |
| Right | (1, 0) |
| Down | (0, 1) |
| Right + Down | (0.707, 0.707) ← Normalized! |
Input.get_vector() reads the keys and builds a direction vector. It comes normalized (magnitude 1), so moving diagonally is not faster than moving straight.
But what is “move_right”? If you try to run the code now, it won’t work. Godot doesn’t know what those keys are. You have to configure them yourself to define what “move right” means (it can be the D key, the Right Arrow, or the Joystick).
Configure it now:
- Go to Project > Project Settings > Input Map.
- Type
move_rightin the “Add New Action” bar and press Add. - Search for the new action in the list below and press the + button to its right.
- Press the D key (and optionally the Right Arrow key) and click OK.
- Repeat the process for the rest:
move_left: Key A.move_up: Key W.move_down: Key S.
If you want, you can additionally add the joystick (left stick) and the D-pad to each action.
4. velocity = direction * 300
The direction is a vector of magnitude 1. By multiplying by 300, we get “300 pixels per second in that direction”. It’s like saying: “Point there and go at speed 300”.
5. move_and_slide()
This function reads velocity automatically (no need to pass it) and moves the node. Also, it manages collisions: if there is a wall, it “slides” instead of sticking. That’s why it’s called “move and slide”.
4. Why do you run faster diagonally? (Pythagoras)
If you press Right (1, 0) and Down (0, 1) at the same time, Godot adds the vectors. The result is (1, 1).
How long is that vector (1, 1)? Here enters our Greek friend.
Imagine you are in a grid city (like Barcelona’s Eixample or Manhattan):
- Walking 1 block East takes 1 minute.
- Walking 1 block South takes 1 minute.
- If you walk East and then South, it takes 2 minutes in total.
But, what if you cross the street diagonally? Here enters Mr. Pythagoras with his famous Theorem. Don’t be scared, let’s dissect it piece by piece:
What does each letter mean?
- (Hypotenuse): It is the long distance, the length (magnitude) of the vector.
- and (Cathetus): They are the straight sides. In our case, the movement in X (1 step) and in Y (1 step).
Take out the calculator! Really, do it. Let’s substitute the letters with our numbers (1 right, 1 down):
-
Square: means . It’s still .
Result:
-
Add: .
Result:
-
Square Root: Look for the button on your mobile calculator and put .
Result:
Gamer Dictionary 🤓
In video games and mathematics, we call this length the Magnitude or Module of the vector. It is also known as Euclidean Distance (the straight line between two points).
When we do input_vector.length() in Godot, the engine does this Pythagoras calculation for you.
There you have it! If we do nothing, your direction has a force of 1.41. Compared to the force of 1.0 when you go straight, you are running 41% faster!
Simulador
(0, 0)0.000💤 Nave parada.
This is a classic problem (“Speedrunning hack”). In a competitive game, everyone would go diagonally to arrive sooner.
The Solution: Normalize
Normalizing a vector means: “I don’t care how long the vector (the arrow) is, cut it so it measures exactly 1, but keep the direction”.
Godot is smart. Input.get_vector() ALREADY normalizes the result by default.
It is important to know this because in shader math or AI, you will have to use .normalized() manually many times when you only care about the direction () and not the force.
5. What the hell is delta?
You will see delta in all tutorials.
position += velocity * deltaposition += velocity * deltaImagine your game runs at 60 FPS (frames per second). Your code runs 60 times per second. Now imagine your friend’s runs at 144 FPS. Their code runs 144 times per second.
If you add position += 1 in each frame:
- You advance 60 pixels every second.
- Your friend advances 144 pixels every second.
Your friend is faster just because they have a better PC! That is unfair (and breaks physics).
Delta is the time passed since the last frame.
- If you go at 60 FPS, delta is
1/60(approx 0.016s). - If you go at 144 FPS, delta is
1/144(approx 0.006s).
If you multiply by delta:
- You:
1 * 60 times * 0.016 = 1meter per second. - Friend:
1 * 144 times * 0.006 = 1meter per second.
Conclusion: Multiplying by Delta turns “Pixels per Frame” into “Pixels per Second”. It makes the game run the same on a potato as on a NASA PC.
Godot Note
move_and_slide() uses delta automatically inside, that’s why in the code above you don’t see it multiplying. But if you move things manually changing position, ALWAYS use delta.
6. Final Script (For now)
Before one copying, look at two new details:
@export: This magic word makes thespeedvariable appear in the Inspector of Godot. So you can adjust the speed by typing a number in the box without opening the script again.direction * speed: Remember thatdirectionis worth 1 (it is a Unit Vector). It is just the pure direction. By multiplying it by 400, we convert that 1 into 400 pixels per second.- This means: “Move 400 pixels per second in that direction”.
extends CharacterBody2D

@export var speed = 400

func _physics_process(delta):
  var direction = Input.get_vector("move_left", "move_right", "move_up", "move_down")

  velocity = direction * speed
  move_and_slide()
extends CharacterBody2D
@export var speed = 400
func _physics_process(delta):
var direction = Input.get_vector("move_left", "move_right", "move_up", "move_down")
velocity = direction * speed
move_and_slide()Congratulations! You have a ship that moves consistently in all directions.
7. Testing everything: Your First Level (Sandbox)
Until now we have worked in the “workshop” (the Player scene). But a ship needs a universe.
If you hit the Play (F5) button now, it will ask for a main scene. Let’s create it:
- Create a New Scene.
- Choose 2D Scene (Node2D). This time we don’t want physics, just a container for the world. Call it
Level(PascalCase, because it is a Node). - Save it in
scenes/level.tscn(snake_case, because it is a file).
Instancing the Player (The “Link”)
Here lies the magic of Godot. We are not going to “copy and paste” the player. We are going to reference it.
- Find your
player.tscnfile in thescenesfolder (bottom left). - Drag it from the file explorer and drop it inside the Scene panel (top left, under where it says
Level). This will place it automatically at position(0, 0), perfectly centered. - You will see that it appears with a movie clapper icon 🎬 next to it. That means it is an Instance. If you change the original
player.tscn(e.g., paint it red), this one will also change!
Lights, Camera… Coordinates!
To help us with the math (where 0 is top and maximum is bottom):
- In the
Levelscene, add a child nodeCamera2D. - In the Inspector, find Anchor Mode and change it to
Fixed Top Left.- This makes the top left corner (0,0), like in classic pixel screens.
Centering the Ship
Now that (0,0) is the corner, your ship (which is at 0,0) will look cut off at the top left. Let’s place it in the exact center using logic:
- Godot’s default resolution is 1152 x 648 (too wide for our retro game). Let’s change it to 800 x 600:
- Go to Project > Project Settings > Display > Window.
- Change
Viewport Widthto 800. - Change
Viewport Heightto 600.
- The center is now:
800 / 2 = 400(X) and600 / 2 = 300(Y). - Select the
playernode (the instance). - In Inspector > Transform > Position, write:
- X:
800/2 - Y:
600/2
- X:
Trick: Godot knows math!
You can literally write 800/2 in the box and it will calculate it. Or you can simply move the Player with the mouse to where you want in the 2D view.
Let’s Play!
- Press F5 (or the Play button top right).
- It will ask: “No Main Scene defined. Select one?”. Tell it Select Current.
- There you have it! Your ship moving in your new world.
Is my ship going off-screen?
It’s normal! We haven’t put limits (walls) yet. Your ship travels happily towards the infinite of mathematical coordinates. In future chapters, we will put walls to this universe.