Enemies and Signals: Contact!
We are already shooting, but our bullets travel into infinity without hitting anything. It’s time to create flying targets. But first, a vital architectural decision.
1. The Area2D Node
For the player, we used CharacterBody2D because we wanted precise movement physics (colliding with walls and sliding).
For bullets and simple enemies, we will use Area2D.
Why use Area2D?
- It’s cheaper: Consumes less CPU than a full physics body.
- Allows overlapping: In a Space Shooter, you don’t want enemies to bounce off, but to detect that they touched you and explode.
Area2Dis perfect for detecting overlaps without pushing. - Physics Superpowers: Inherits from
CollisionObject2D, making it visible to the physics engine (unlike a normalNode2Dwhich would be invisible even with a shape).
Preparing the Enemy Scene
You can use your own sprite or download this one:
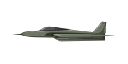
Right click -> Save image.
Credits: Set of military aircraft by brgfx on Freepik (Free license with attribution).
- Create a new Scene. Root node:
Area2D. Name:EnemyPlane. - Add
Sprite2D(your enemy ship). - Add
CollisionShape2D(circle or rectangle covering the ship). - Attach a Script to the Area2D: Save it as
enemy_plane.gd.
Don't forget the shape!
An Area2D without a CollisionShape2D is useless. Godot will show you a yellow warning ⚠️ if you forget to add it.
2. Preparing the Script
Before writing code, let’s analyze what our enemy needs to do. We will mix three concepts:
A. Signals via Code
In the previous chapter, we used the editor to connect signals. Today we will do it by Code in _ready() using connect().
This allows each enemy to be autonomous and know how to react without needing manual configuration in the editor every time we instantiate one.
B. Simulated Physics
Since we use Area2D and not a physics body (RigidBody), gravity doesn doesn’t affect us.
If we want the enemy to fall dramatically when dying, we’ll have to program that fall manually by modifying its position. It’s a very common and cheap visual trick.
C. State
We’ll need to know if the enemy is alive (moving straight) or dying (falling). We will use a variable (“flag”) to control this state.
3. Programming the Enemy
Let’s build the script piece by piece.
Phase 1: Basic Movement
First, let’s make it move to the left. Nothing new here.
extends Area2D

# We export speed so we can adjust it in the editor
@export var speed = 150

# We ignore _ready() for now
func _ready() -> void:
  pass

# We add movement in _process
func _process(delta) -> void:
  position.x -= speed * delta
extends Area2D
# We export speed so we can adjust it in the editor
@export var speed = 150
# We ignore _ready() for now
func _ready() -> void:
pass
# We add movement in _process
func _process(delta) -> void:
position.x -= speed * deltaDeep diving into @export:
In Part 1 we saw that @export makes the variable appear in the Inspector. But there is more:
- Balancing without recompiling: You can change
speedin the Inspector while the game is PAUSED (F7) and see the effect immediately. This is invaluable for adjusting difficulty. - Values per instance: If you have 3 enemies in the scene, each can have a different
speedWITHOUT modifying the script. Simple: select one and change its value in the Inspector. - Implicit documentation: The variable name appears in the editor, making others (or your future self) understand what can be tweaked.
Phase 2: Signal Connection
Now we add the connection. Remember: connect(who_responds).
func _ready():
  # area_entered is an Area2D signal, with .connect we make it call a
  # function we will define right below
  area_entered.connect(_on_area_entered)

# This function will run when something touches the CollisionShape2D of this Area2D
# thanks to the behavior of area_entered
func _on_area_entered(area):
  print("I've been hit!") # <-- This is only temporary
func _ready():
# area_entered is an Area2D signal, with .connect we make it call a
# function we will define right below
area_entered.connect(_on_area_entered)
# This function will run when something touches the CollisionShape2D of this Area2D
# thanks to the behavior of area_entered
func _on_area_entered(area):
print("I've been hit!") # <-- This is only temporaryWhere does the area parameter come from?
The area_entered signal doesn’t just notify about the collision, it also passes information: the other Area2D that collided with you. In our case, that “other” is the bullet fired by the player.
That’s why, inside _on_area_entered(area), the area variable contains a direct reference to the bullet node. This allows us to do things like area.queue_free() to destroy it.
Phase 3: Life and Death
We add health (hp) and damage logic.
@export var speed = 150
@export var hp = 3 # We add the hp variable to control health and expose it
                 # in the editor for convenience

# Intermediate code ---

func _on_area_entered(area):
  # The 'area' parameter is the OTHER Area2D collision, the bullet
  hp -= 1
  # area.queue_free() # If you uncomment this, the bullet will be destroyed (won't pierce)

  # A basic 'if' conditional, if hp is less than or equal to 0, call die()
  if hp <= 0:
      die()

func die():
  # As we've explained, queue_free() will delete the Area2D
  # (puts it in a queue to delete it)
  queue_free()
@export var speed = 150
@export var hp = 3 # We add the hp variable to control health and expose it
# in the editor for convenience
# Intermediate code ---
func _on_area_entered(area):
# The 'area' parameter is the OTHER Area2D collision, the bullet
hp -= 1
# area.queue_free() # If you uncomment this, the bullet will be destroyed (won't pierce)
# A basic 'if' conditional, if hp is less than or equal to 0, call die()
if hp <= 0:
die()
func die():
# As we've explained, queue_free() will delete the Area2D
# (puts it in a queue to delete it)
queue_free()Phase 4: Dramatic Death (Fake Physics)
Since we use Area2D and not RigidBody2D, we don’t have real physics. We are going to “fake” that the enemy falls when dying.
We need an is_dying variable to know if it is in “falling mode”.
# We define a couple of enemy state variables
var is_dying = false # boolean, if dead or not, default is not dead (false)
var fall_speed = 0.0 # number, controls fall speed, default 0

func _process(delta):
  if is_dying:
      # Fall with simulated gravity, if dying add speed
      fall_speed += 500 * delta
      # Now, having the speed, we tell it where to move
      position.y += fall_speed * delta # Add vertical speed
      position.x -= speed * 0.5 * delta # Subtract horizontal speed (braking)
  else:
      position.x -= speed * delta # Normal movement we already had
# We define a couple of enemy state variables
var is_dying = false # boolean, if dead or not, default is not dead (false)
var fall_speed = 0.0 # number, controls fall speed, default 0
func _process(delta):
if is_dying:
# Fall with simulated gravity, if dying add speed
fall_speed += 500 * delta
# Now, having the speed, we tell it where to move
position.y += fall_speed * delta # Add vertical speed
position.x -= speed * 0.5 * delta # Subtract horizontal speed (braking)
else:
position.x -= speed * delta # Normal movement we already hadWhat is that else?
Until now we’ve used if (“If this happens…”). The else means “If NOT…”.
It’s like a two-way switch:
- IF (
is_dyingis true): Executes the falling physics. - ELSE (if not, in the other case): Executes the normal movement to the left.
This ensures the enemy never does both things at once. Either it’s approaching the player, or it’s dying.
Phase 5: Deleting the Instance
When hp reaches 0, we call die(). This function:
- Activates the
is_dyingstate so_processruns the fall. - Disables collisions to ignore impacts during the animation.
- Uses a timer to destroy the node after 1 second.
func die():
  is_dying = true
  # set_deferred avoids errors if called during a collision
  $CollisionShape2D.set_deferred("disabled", true)
  # Wait 1 second and destroy
  await get_tree().create_timer(1.0).timeout
  queue_free()
func die():
is_dying = true
# set_deferred avoids errors if called during a collision
$CollisionShape2D.set_deferred("disabled", true)
# Wait 1 second and destroy
await get_tree().create_timer(1.0).timeout
queue_free()Phase 6: Preventing Bugs (The Guard Clause)
There is a subtle but dangerous detail. What happens if we put 20 bullets into the enemy while it’s falling?
We would call die() 20 times.
To avoid this, we improve _on_area_entered with two golden rules:
- If I’m already dying, ignore bullets: We use
if is_dying: returnto exit the function immediately. - If you touch me, you disappear: The bullet (
area) must always be destroyed upon impact.
func _on_area_entered(area):
  # 1. Guard Clause: If I'm dead, don't bother
  if is_dying:
      return

  hp -= 1
  # 2. The bullet hits and disappears (always)
  area.queue_free()

  if hp <= 0:
      die()
func _on_area_entered(area):
# 1. Guard Clause: If I'm dead, don't bother
if is_dying:
return
hp -= 1
# 2. The bullet hits and disappears (always)
area.queue_free()
if hp <= 0:
die()5. Complete Script
Now assemble all the pieces. This is how your final enemy_plane.gd file looks:
extends Area2D

@export var speed = 150
@export var hp = 3

var is_dying = false
var fall_speed = 0.0

func _ready():
  area_entered.connect(_on_area_entered)

func _process(delta):
  if is_dying:
      fall_speed += 500 * delta
      position.y += fall_speed * delta
      position.x -= speed * 0.5 * delta
  else:
      position.x -= speed * delta

func _on_area_entered(area):
  if is_dying:
      return

  hp -= 1
  area.queue_free()

  if hp <= 0:
      die()

func die():
  is_dying = true
  $CollisionShape2D.set_deferred("disabled", true)
  await get_tree().create_timer(1.0).timeout
  queue_free()
extends Area2D
@export var speed = 150
@export var hp = 3
var is_dying = false
var fall_speed = 0.0
func _ready():
area_entered.connect(_on_area_entered)
func _process(delta):
if is_dying:
fall_speed += 500 * delta
position.y += fall_speed * delta
position.x -= speed * 0.5 * delta
else:
position.x -= speed * delta
func _on_area_entered(area):
if is_dying:
return
hp -= 1
area.queue_free()
if hp <= 0:
die()
func die():
is_dying = true
$CollisionShape2D.set_deferred("disabled", true)
await get_tree().create_timer(1.0).timeout
queue_free()Done! You have created an autonomous enemy that manages its own movement, collisions, and death, all encapsulated in a robust script.
Testing in your World
Before moving to the next chapter, verify everything works:
- Open
level.tscn(your main scene). - Drag
enemy_plane.tscnfrom the FileSystem panel into the viewport. - Position the enemy to the right of the screen (so it flies towards the player).
- Run the game (F5).
- Shoot the enemy and verify:
- Bullets disappear on impact.
- The enemy loses HP and eventually falls spinning.
- After 1 second of falling, it disappears.
If everything works, congratulations! Your combat system is operational.
Let’s review what we learned
Area2D: Node for detecting overlaps without push physics.- Signals via code: Using
signal.connect(function)in_ready()to encapsulate logic. - State (
is_dying): Using “flag” variables to control behavior. - Simulated physics: Modifying
positionmanually to create fall effects. set_deferred(): Disabling collisions safely during physics callbacks.await+ Timer: Waiting a bit before executing code (e.g., destroy after 1 second).
In the next chapter, we will learn to give visual feedback with Shaders (the famous “Hit Flash”).