Instantiation: The art of creating things from nothing
In the previous part, we moved our ship. Now it’s time for the ship to do more than just fly around: Shoot.
What will we learn?
- Instantiating Scenes: Using
preloadandinstantiateto create bullets. - Scene Tree: Understanding where to put those bullets (
add_child) so they don’t move with the ship. - Local vs Global: Coordinates so the bullet leaves the muzzle, not the world origin.
- Cleanup: Using
VisibleOnScreenNotifier2Dto delete bullets and not melt the RAM.
1. Recipe: The Bullet (bullet.tscn)
Before shooting anything, we need something to shoot. We’re going to create a bullet that knows how to move and die when it leaves the screen.
Just like with the ship, you can download this image for the bullet if you want:

Right click -> Save image.
Credits: Lunar Battle Pack by MattWalkden (CC0 1.0).
-
Create a New Scene.
-
Root Node:
Area2D(Note! We don’t want complex physics like bouncing, just detecting if we touch something). Name itBullet. -
Child:
CollisionShape2D(with a rectangle or small capsule shape covering the sprite). -
Child:
AnimatedSprite2D: [NEW] Let’s bring it to life! We won’t use a static image.- In the Inspector, find the
Sprite Framesproperty -> Click where it says<empty>-> SelectNew SpriteFrames. - Click again on the
SpriteFramestext you just created to open the bottom editing panel. - In the bottom panel, find the grid icon (“Add frames from sprite sheet”) and click it.
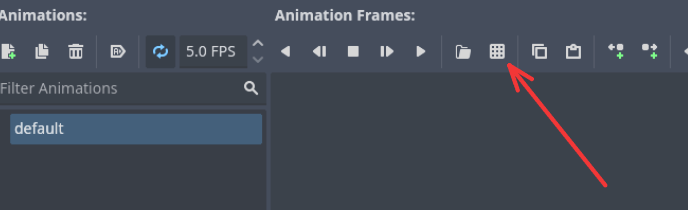
- Select the
shot-atlas.pngfile. - In the popup window, you’ll see your image. Configure the divisions: Horizontal: 3, Vertical: 1.
- Select all 3 frames (click or drag) to highlight them and press Add 3 frames.
- Animation Settings:
- Find the “Animation Looping” button (rotating arrows icon) in the left panel and DISABLE it. We want it to grow once and stay big, not pulsate.
- Change FPS (Speed) to 12. Since there are only 3 frames, this will make it “grow” super fast (in 0.25 seconds).
- Finally, to the left of “Animation Looping” of the
AnimatedSprite2Dnode, enable the “Autoplay on Load” button. This ensures the animation starts by itself when fired.
- In the Inspector, find the
-
Child:
VisibleOnScreenNotifier2D: This node is magic. It notifies us when the object leaves the screen.- Make sure the pink rectangle of this node covers the entire sprite.
1.1 Automatic Cleanup (Signals)
Before programming the movement, let’s make sure the bullet deletes itself when leaving the screen. For this, we’ll use a Signal.
The VisibleOnScreenNotifier2D node emits the screen_exited signal when it leaves the screen.
We (the script) will connect that signal to a function to react.
Steps to connect the wire:
- Add a script to the bullet (
bullet.gd) if you haven’t already. - Select the
VisibleOnScreenNotifier2Dnode. - Go to the Node tab (on the right, next to the Inspector).
- Double click on the
screen_exitedsignal. - Hit Connect.
- Godot will automatically write a function called
_on_visible_on_screen_notifier_2d_screen_exitedin your script.
Using the Node panel is the “fast track” or prototyping way. It’s visual and excellent for starting. However, in serious projects or for complex logic, we usually connect signals via Code to have more control so nothing depends on clicks in the editor.
For this simple bullet, the visual method is perfect. In the next chapter, we will learn the code way (“The Professional way”) when we create the enemies.
Now that we have the connection, let’s complete the code:
extends Area2D

var speed = 1500

func _physics_process(delta: float) -> void:
  position.x += speed * delta

func _on_visible_on_screen_notifier_2d_screen_exited() -> void:
  queue_free()
extends Area2D
var speed = 1500
func _physics_process(delta: float) -> void:
position.x += speed * delta
func _on_visible_on_screen_notifier_2d_screen_exited() -> void:
queue_free()Script Breakdown:
1. extends Area2D
We inherit from Area2D because we only need to detect if the bullet “touches” something. We don’t need physical bouncing (RigidBody) or complex character movement (CharacterBody).
2. position.x += speed * delta
We want the bullet to move forward to the right (positive X) by itself. To do this, we add velocity to its position in every frame. We multiply by speed to define the quickness and by delta to ensure the movement is smooth and consistent on any computer (preventing it from going faster if you have higher FPS).
3. _on_..._screen_exited()
Infinite bullets consume memory until the game crashes. We need to detect when the bullet leaves the camera view and stops being useful. We use the signal from the VisibleOnScreenNotifier2D node to notify us and call queue_free() to delete it cleanly.
Note on Performance (The Myth of
queue_free):queue_free()tells RAM: “Delete this and free space”. And when shooting again: “Find space and assign memory”. In a normal game, nothing happens. But in a Bullet Hell with 5,000 bullets, doing this constantly causes stuttering (lag) because the processor gets overwhelmed cleaning garbage. Future solution: In advanced chapters, we will see Object Pooling (recycling bullets instead of deleting them). For now,queue_free()is perfect.
What does queue_free() mean?
Literally translated: “Queue to free”.
In game programming, deleting something while it’s being used is dangerous (it can crash the game suddenly).
queue_free() is the safe way to do it:
- Marks the object for deletion.
- Godot waits to finish drawing the current frame.
- At the safe moment (“Idle time”), it deletes the object from memory.
Always use queue_free() instead of free() to avoid errors.
2. The Blueprint and the Object (PackedScene)
In Godot, there is a fundamental distinction:
.tscn(The Scene): It is the original blueprint. It defines which nodes compose it and how they work.- The Instance: It is a living copy of that scene. The game creates these copies to use them (one copy for the player, 10 copies for bullets, etc.).
When you play, you interact with these copies.
To shoot, we need to create a new copy of the bullet.tscn scene every time you press space.
The construction process
In GDScript, creating something new has 3 steps:
- Load the Blueprint:
preload("res://bullet.tscn"). - Instantiate:
blueprint.instantiate(). You build the object in RAM, but it does not exist in the visible world yet. - Add to Tree:
add_child(bullet). Here you place the object in the game universe.
Why preload and not load?
Godot has two ways to load resources:
preload("path"): Loads the scene when the game starts. It is faster in execution because it is already in memory, but consumes RAM from the beginning.load("path"): Loads the scene on demand, exactly when that line is executed. It saves initial RAM, but can cause stutters (micro-pauses) if the resource is heavy.
For bullets (small files we’ll use constantly), preload is the right choice.
3. Implementing Shooting
How do we ask the game?
To shoot, we need the script to take decisions. We use two new tools:
if(Conditional): “IF this happens… do this else”.Input: In the previous chapter we usedget_vector. Now we will useis_action_pressed(“Is the key being held?”).
Mandatory Configuration (Input Map): Just like we did with WASD:
- Go to Project > Project Settings > Input Map.
- Add a new action called
shoot. - Assign it the Space Bar and, if you want, the Left Mouse Button or the Gamepad A/X button.
Step 1: Load the ammo
To shoot bullets, we first must tell the script which is the bullet scene. We add this line at the beginning of the script, next to the other variables:
extends CharacterBody2D

@export var speed = 400
# "preload" loads the blueprint into RAM when the game starts
var bullet_scene = preload("res://scenes/bullet.tscn")
extends CharacterBody2D
@export var speed = 400
# "preload" loads the blueprint into RAM when the game starts
var bullet_scene = preload("res://scenes/bullet.tscn")Step 2: Pull the trigger (Input)
Now let’s go to _physics_process and ask if the player is pressing the shoot button.
func _physics_process(delta: float) -> void:
  # ... movement code ...

  # If the "shoot" key appears HELD
  if Input.is_action_pressed("shoot"):
      shoot()
func _physics_process(delta: float) -> void:
# ... movement code ...
# If the "shoot" key appears HELD
if Input.is_action_pressed("shoot"):
shoot()Note:
is_action_pressedreturnstrueas long as you hold the key down. If you wanted to shoot only once per click (semi-automatic), you would useis_action_just_pressed. For this game, we want automatic fire.
Step 3: Fire! (The basic function)
We create the shoot() function at the end of the file. Here happens the magic of instantiating.
func shoot():
  # 1. Create a copy of the bullet in memory
  var bullet = bullet_scene.instantiate()

  # 2. Add it to the visible world (as our child)
  add_child(bullet)
func shoot():
# 1. Create a copy of the bullet in memory
var bullet = bullet_scene.instantiate()
# 2. Add it to the visible world (as our child)
add_child(bullet)Problem 1: Uncontrolled Burst
If you run the game now and hold space, you’ll see thousands of bullets coming out.
Why? Because _physics_process runs 60 times per second.
You are creating 60 bullets every second. That will destroy performance and gameplay.
Solution: We need a Cooldown (Waiting time between shots).
Problem 2: Bullets move with the ship
If you move while shooting, you’ll see that the bullets move with you.
Why? Because you used add_child(bullet).
Being a child of the ship, the bullet inherits your position and rotation. Basically, you carry the bullets stuck to your body!
Solution: The bullet must be a child of the World, not the Ship.
Step 4: Controlling the chaos (Cooldown & Hierarchies)
To fix problems 1 (Burst) and 2 (Kangoroo), we need to improve our script step by step.
4.1. New Variables
We need memory to know how much time has passed and if we can shoot. Add this at the beginning:
@export var fire_rate = 0.125 # Time between bullets (0.125s = 8 bullets/sec)
var can_shoot = true          # Is the weapon ready?
var shoot_timer = 0.0         # Time counter
@export var fire_rate = 0.125 # Time between bullets (0.125s = 8 bullets/sec)
var can_shoot = true # Is the weapon ready?
var shoot_timer = 0.0 # Time counter4.2. The Timer (The Logic)
In _physics_process, we need someone to count time backwards when the weapon is “cooling down”.
func _physics_process(delta: float) -> void:
  # ... movement goes here ...

  # COOLDOWN MANAGEMENT
  if not can_shoot:
      shoot_timer -= delta  # Subtract the time passed
      if shoot_timer <= 0.0:
          can_shoot = true  # Reloaded!

  if Input.is_action_pressed("shoot") and can_shoot: # <-- add "and can_shoot" at the
  # end to control the fire rate.
      shoot()
func _physics_process(delta: float) -> void:
# ... movement goes here ...
# COOLDOWN MANAGEMENT
if not can_shoot:
shoot_timer -= delta # Subtract the time passed
if shoot_timer <= 0.0:
can_shoot = true # Reloaded!
if Input.is_action_pressed("shoot") and can_shoot: # <-- add "and can_shoot" at the
# end to control the fire rate.
shoot()4.3. Improved Shooting
We update the shoot() function. Now, besides shooting, it must lock the weapon and start the timer.
And most importantly: Fix the hierarchy.
func shoot():
  # 1. Lock the weapon
  can_shoot = false
  shoot_timer = fire_rate

  # 2. Instantiate
  var bullet = bullet_scene.instantiate()

  # 3. KANGAROO FIX:
  # Instead of add_child(bullet), we put it up for adoption to the PARENT (the World)
  get_parent().add_child(bullet)

  # 4. Important: Since it's independent now, we must tell it "Go to where I am"
  bullet.global_position = global_position
func shoot():
# 1. Lock the weapon
can_shoot = false
shoot_timer = fire_rate
# 2. Instantiate
var bullet = bullet_scene.instantiate()
# 3. KANGAROO FIX:
# Instead of add_child(bullet), we put it up for adoption to the PARENT (the World)
get_parent().add_child(bullet)
# 4. Important: Since it's independent now, we must tell it "Go to where I am"
bullet.global_position = global_positionFinal Code: Player.gd
If we put all the pieces together, this is how your complete and functional script should look:
extends CharacterBody2D

@export var speed = 400
@export var fire_rate = 0.125
var bullet_scene = preload("res://scenes/bullet.tscn")

var can_shoot = true
var shoot_timer = 0.0

func _physics_process(delta: float) -> void:
  # 1. Movement
  var direction = Input.get_vector("move_left", "move_right", "move_up", "move_down")
  velocity = direction * speed
  move_and_slide()

  # 2. Cooldown Logic
  if not can_shoot:
      shoot_timer -= delta
      if shoot_timer <= 0.0:
          can_shoot = true

  # 3. Trigger (now checking "can_shoot")
  if Input.is_action_pressed("shoot") and can_shoot:
      shoot()

func shoot():
  can_shoot = false
  shoot_timer = fire_rate

  var bullet = bullet_scene.instantiate()
  get_parent().add_child(bullet)
  bullet.global_position = global_position
extends CharacterBody2D
@export var speed = 400
@export var fire_rate = 0.125
var bullet_scene = preload("res://scenes/bullet.tscn")
var can_shoot = true
var shoot_timer = 0.0
func _physics_process(delta: float) -> void:
# 1. Movement
var direction = Input.get_vector("move_left", "move_right", "move_up", "move_down")
velocity = direction * speed
move_and_slide()
# 2. Cooldown Logic
if not can_shoot:
shoot_timer -= delta
if shoot_timer <= 0.0:
can_shoot = true
# 3. Trigger (now checking "can_shoot")
if Input.is_action_pressed("shoot") and can_shoot:
shoot()
func shoot():
can_shoot = false
shoot_timer = fire_rate
var bullet = bullet_scene.instantiate()
get_parent().add_child(bullet)
bullet.global_position = global_positionNow yes. We have precise rhythm control and independent bullets.
4. Adjusting Spawn Position (Marker2D)
Right now the bullet comes out of the center of the ship (its belly). It looks ugly. To fix it, we’ll use an invisible node that serves as a “reference”.
- Open the Player scene and add a child node
Marker2Dto the main node (also named Player). - Name it
Muzzle. - Move it visually to the tip of the cannon (or wherever you want bullets to spawn).
Now we update the code to use this marker:
func shoot():
  can_shoot = false
  shoot_timer = fire_rate

  var bullet = bullet_scene.instantiate()

  get_parent().add_child(bullet)

  # We use the Muzzle position
  bullet.global_position = $Muzzle.global_position
func shoot():
can_shoot = false
shoot_timer = fire_rate
var bullet = bullet_scene.instantiate()
get_parent().add_child(bullet)
# We use the Muzzle position
bullet.global_position = $Muzzle.global_positionSummary and Challenges
Today you learned one of the fundamental concepts of software development: Instantiation (creating objects dynamically).
Let’s review the key concepts:
- Scenes (
.tscn): They are the blueprints of your objects. - Instantiate: Converting those blueprints into living objects in the game (
.instantiate()). - Marker2D Nodes: Invisible reference points vital for
spawns. - Signals: Invisible wires for objects to talk (
screen_exited). queue_free(): The safe way to delete garbage from memory.
In the next chapter, we will turn this empty shooting range into a real battle. We will create Enemies that manage their own health and detect collisions. Prepare your ammo!